|
|||||||||


![]()
![]()
![]()
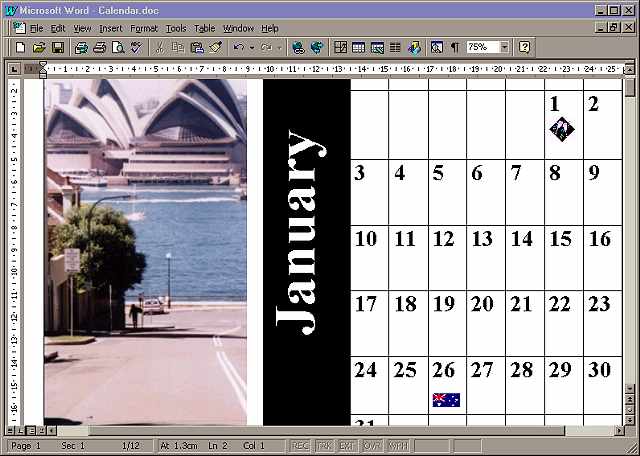
 Customised calendar Helen Bradley shares a unique gift idea that is personal and inexpensive.
|
||||
| A
customized calendar is a great Christmas present that you can create from your own PC. You
can create customised calendars as business gifts for your customers or as personal gifts
for friends and relations (see Figure 1a).
Word 97 If you plan to use the Word 95 Wizard, be aware that Word 97 converts each old Word 95 file into a Word 97 format before it runs it the first time, and after the conversion these won't work again in Word 95. So, if you're going to use an old Word 95 template or wizard and you still want it to work in Word 95, first copy the file (for example, calendar.wiz) to a new directory and use the copy and not the original version. If you aren't sure whether the Calendar Wizard is installed or you don't know where it's located, use Windows Explorer and select Tools, Find, Files or Folders, type the filename calendar.wiz and search a drive or your whole computer (My Computer).
|
|
|||
| Creating the calendar Once you have the wizard installed you can use it to create your calendar:
|
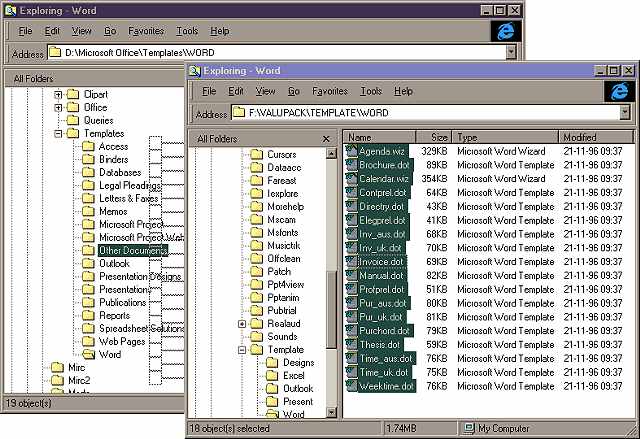 Figure 2a: Word 97's Calendar Wizard is not installed in a typical installation but you can install it easily by copying it from the CD into any template folder.
|
|||
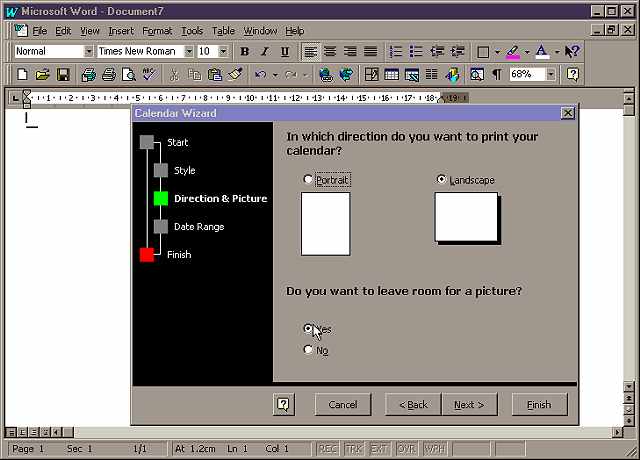 Step 2: Complete
the three steps in the wizard selecting your choice of Style, Direction & Picture and
Date range. Choose the style of the calendar you like best, and, if you would like to add
a picture (as in the figures) then select the option to allow room for a picture in the
second step. Select from portrait and landscape mode (landscape is possibly the better to
use) and for a full year calendar start it in January 1999 and finish in December 1999.
Select Finish to create your calendar. Step 2: Complete
the three steps in the wizard selecting your choice of Style, Direction & Picture and
Date range. Choose the style of the calendar you like best, and, if you would like to add
a picture (as in the figures) then select the option to allow room for a picture in the
second step. Select from portrait and landscape mode (landscape is possibly the better to
use) and for a full year calendar start it in January 1999 and finish in December 1999.
Select Finish to create your calendar.
|
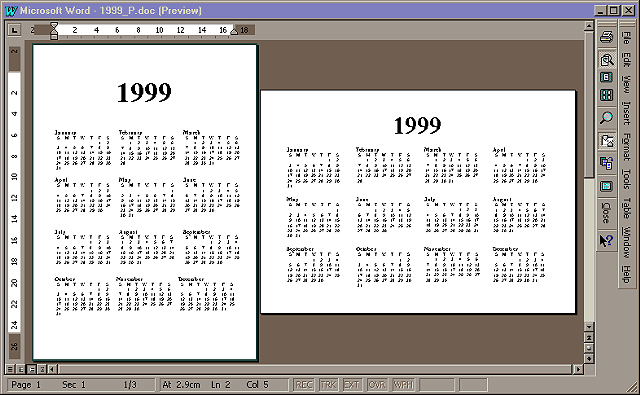 Figure 3b: These full year calendars have been created exclusively for PC User readers and they are available in Word 97 format on this month's cover disc. |
|||
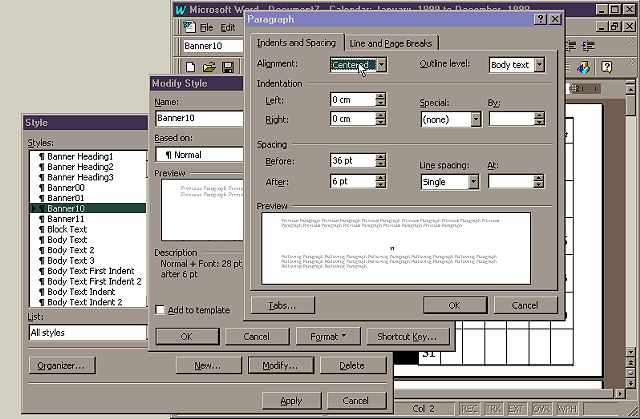 Step 3: You can now
customise the calendar. One change we made to this calendar was to move the numbers up to
the top-left of each table cell. The formatting of a cell is determined by a style so to
alter it, place your insertion point in one of the date numbers and select Format, Style.
Because you placed your insertion point in a number before you selected the Format menu,
the style of the numbers will be automatically selected for you, so select the Modify
button. Now select the Format button, select Paragraph from the menu, and select the
Indents and Spacing tab. Alter the alignment to Left and the Spacing Before figure to 0
and select OK, OK and then Close. Step 3: You can now
customise the calendar. One change we made to this calendar was to move the numbers up to
the top-left of each table cell. The formatting of a cell is determined by a style so to
alter it, place your insertion point in one of the date numbers and select Format, Style.
Because you placed your insertion point in a number before you selected the Format menu,
the style of the numbers will be automatically selected for you, so select the Modify
button. Now select the Format button, select Paragraph from the menu, and select the
Indents and Spacing tab. Alter the alignment to Left and the Spacing Before figure to 0
and select OK, OK and then Close.Changing the Style like this will alter each number in each month of the Calendar in one step so you might like to experiment with the style of the numbers more, for example, to change the font style, size or colour. If you make a mistake, select Edit, Undo to undo the last change or select the Undo button on the Standard Toolbar to undo multiple changes one at a time.
|
||||
 Step 4: If you have
asked for room for a picture on your calendar then you can replace the picture that Word
has inserted with your own. Select a clipart image or for added interest use a scanned
photo. If you're a business you can add one photo for each month profiling your key people
or your products. If you're a family you can include a snapshot of a family member or one
of your pets on each page of the calendar. To do this, first scan your image and store it
on your hard disk in a format that Word can read such as BMP, TIF, JPG etc. Then select
the picture that Word placed on a calendar page and select Insert, Picture, From File.
Locate the image on your hard drive and select it and click Insert. Using the tools on the
Picture toolbar you can adjust the size of the image and crop it to fit if necessary Step 4: If you have
asked for room for a picture on your calendar then you can replace the picture that Word
has inserted with your own. Select a clipart image or for added interest use a scanned
photo. If you're a business you can add one photo for each month profiling your key people
or your products. If you're a family you can include a snapshot of a family member or one
of your pets on each page of the calendar. To do this, first scan your image and store it
on your hard disk in a format that Word can read such as BMP, TIF, JPG etc. Then select
the picture that Word placed on a calendar page and select Insert, Picture, From File.
Locate the image on your hard drive and select it and click Insert. Using the tools on the
Picture toolbar you can adjust the size of the image and crop it to fit if necessary
|
||||
 Step 5: Add small
clipart images to mark special occasions such as birthdays and holidays. To add these,
place your insertion point in the cell to contain the image immediately after the date
number and select Insert, Picture, ClipArt. Select the image and click Insert. The image
will probably be too big for the cell so click on the part that is visible and you'll see
its sizing handles (even if you can't see the entire image). Use these to reduce the image
so it appears inside the table cell and doesn't force the table cell height to change. Step 5: Add small
clipart images to mark special occasions such as birthdays and holidays. To add these,
place your insertion point in the cell to contain the image immediately after the date
number and select Insert, Picture, ClipArt. Select the image and click Insert. The image
will probably be too big for the cell so click on the part that is visible and you'll see
its sizing handles (even if you can't see the entire image). Use these to reduce the image
so it appears inside the table cell and doesn't force the table cell height to change.Choose appropriate flags for national holidays and from the Special Occasion ClipArt (Insert, Picture, ClipArt, Special Occasion) select images for major holidays. Add an image of a cake or a present to a birthday date and a collection of crayons or school supplies to mark the first day back to school.
|
||||
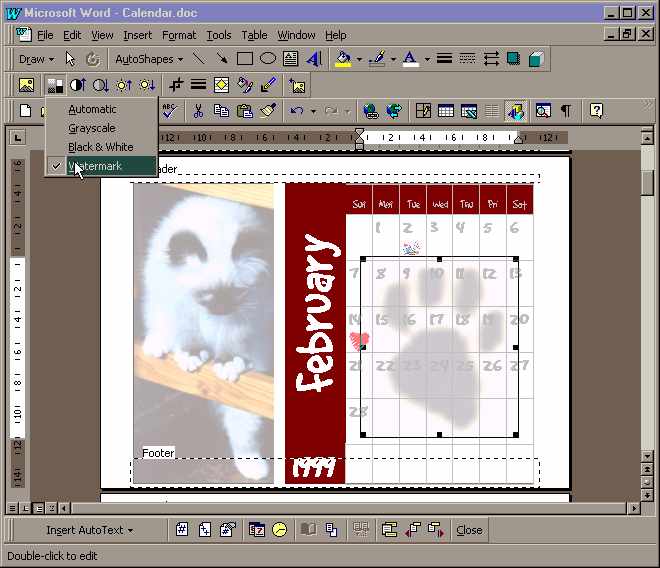 Step 6: You can add
a watermark image behind the calendar by selecting View, Header and Footer. If the Drawing
toolbar is not displayed select View, Toolbars, Drawing. Select the Text Box tool and
click and drag a text box over the table containing the days. Select the Line Color tool
and select No Line and the Fill Color tool and select No Fill. Click inside the text box
and select Insert, Picture and select From File or ClipArt depending on where the image is
that you will use as a watermark. Select the image and select Insert to add it to the
document. Step 6: You can add
a watermark image behind the calendar by selecting View, Header and Footer. If the Drawing
toolbar is not displayed select View, Toolbars, Drawing. Select the Text Box tool and
click and drag a text box over the table containing the days. Select the Line Color tool
and select No Line and the Fill Color tool and select No Fill. Click inside the text box
and select Insert, Picture and select From File or ClipArt depending on where the image is
that you will use as a watermark. Select the image and select Insert to add it to the
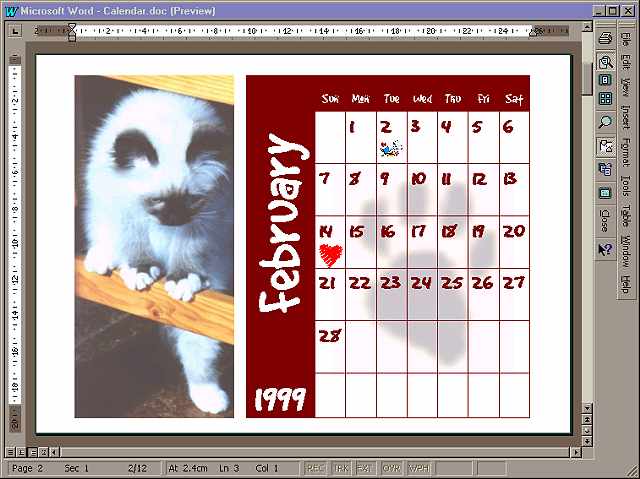
document.If the image is solid and you think you won't see the type over the top of it, select the Image Control tool and select Watermark to reduce its density. When it is in position, select Close to exit the Header and Footer window. Other changes you can make to your calendar are changing the font style and the colour of the boxes. To change the colour of a box, select it and then select Format, Borders and Shading, Shading and select a different shading colour.
|
||||
| Step 7: Save your calendar and
print it, one month to a page. Create and print a suitable cover page and then, if you
printed the calendar in landscape, bind it along its top long edge and for a portrait
calendar bind it along its top short edge. Use a spiral bind that will sit relatively flat
when the calendar is folded to display the current month. A print shop will bind it for a
few dollars if you don't have access to a binder. Punch a single hole in the top middle of
the calendar through all the pages just below the binding and add a small loop of ribbon
through the hole so the calendar can be hung from a hook.
|
||||
| Fancier still If you want to get really fancy, print a large picture of your family or business in the same orientation as the calendar and laminate it. Add it to the calendar inside the front cover and position it so that it faces the first month of dates -- it should be the only sheet that faces 'the wrong way'. Now bind the calendar along the long edge if you used landscape printing and along the short edge if you used portrait printing. This time, punch a single hole in the middle of the cover and the laminated page and add the small loop of ribbon to just these pages. Now your calendar will hang open with the picture visible throughout the year and, at the end of each month the calendar sheet can be torn off to reveal the next month's dates. Your calendar can be as simple or as detailed as you want it to be. The Calendar Wizard takes the hard work out of setting up the page leaving you to do the fun bits like adding pictures and playing around with the fonts and colours. The cost of the calendar will depend on the paper stock you use, whether you print it in colour or black and white and how you present it. If you have access to a suitable binder you could make one for as little as a dollar or two.
|
||||
| Corel WordPerfect 8.0 Select File, New and select the Create New tab. Scroll down the list to locate 'Calendar, Monthly' and click Create. Complete the information for the starting month and year, the number of months and the day that will display in the first column. Use the options provided by the Perfect Expert to change the look of the calendar or close it down and use the usual WordPerfect editing options to fine-tune your calendar. Use Insert, Graphics to add images to the individual dates and Insert, Watermark to add a Watermark image to the calendar.
|
||||
| Lotus Word Pro 97 To create the calendar in Word Pro 97 select File, New and select the Create from any SmartMaster tab. From the 'Select a type of SmartMaster' list select Calendar and from the 'Select a look' list select monthcal.mwp. Select the month and year for the calendar (you will need to repeat this 12 times to create a full year calendar) and wait while the calendar is created. Select View, Layout to work in the final presentation view of your document. Add images to the dates by placing the cursor in the box below a date and select File, Import Picture. To add a watermark, place the insertion point to the right of the table containing the dates and right-click. Select Page Properties and select the Watermark tab. From the Watermark list box select a graphic to use as the watermark and then experiment with the Transparent and sizing options until you get the watermark looking as you want it to.
|
||||
| Helen Bradley can be contacted at helen@journalist.com
|
||||

|
